Sunday, November 3, 2013

So much diversity!


Fall is coming to a close, and with it the end of another gardening season. The storeroom is filled with acorn and butternut squashes, onions are collected and potatoes are all dug up. For those of you lucky enough to have a greenhouse or low tunnels the season is still going, but for the rest of us it's time to clean, compost, prepare and wait til next year's gardening begins.

I'll be spending the winter months talking about a slew of topics from varieties in my test garden to insects. The first topic I want to talk about is diversity, and the amazing variation that is available to gardeners.

Apples (bottom) and grapes (top) from around the world in different size, shapes, colors and textures.
This past September I had the opportunity to drive to the USDA ARS germplasm center in Geneva, New York with my good friend Joseph Tychonievich. For those of you who don't know what a germplasm center is, it is a facility dedicated to the maintenance and preservation of genetically diverse plant material. Before commercialization of fruits and vegetables, people selected plants for flavor, texture, color and winter storage, not for traveling, uniform ripeness and some of these other traits that current varieties of fruits and vegetables have to meet. There were hundreds of varieties of melons, tomatoes, cucumbers, carrots, broccoli, etc. Germplasm centers are facilities that maintain the "heirloom" varieties, but they also have wild and unadapted relatives that might not be tasty, but are good sources to breed in disease resistance and other traits. The United States Department of Ag has a number of germplasm centers across the U.S. The center in New York contains apples, grapes, tart cherries as well as some vegetables like tomatoes. In their apple catalog alone there are 100s of cultivars of apples from all over the world as well as wild species from Kazakhstan.

A young apple forest at the germplasm center. You can see the ground is littered with hundreds of fallen apples. Each tree in this block is from a single seed and is therefore genetically diverse from all the other trees around it.

Apples (Malus spp.) originated in Kazakhstan, and in some parts of that country old apple forests still remain. It is from these forests that apples were brought to the rest of the world and selected until they became the apples varieties that we have now. I had two goals when I visited the germplasm center:  1) Try as many apples as I could and 2) Bring back seeds to plant my own apple forest. 

This apple species had beautiful color, the flesh was an orangish red once you cut it open. The taste was a little too bitter for my taste, but it was one lovely apple!

These are all wild species apples from Kazakhstan. The one on the far left is about the size of a Golden Delicious. This was just a sampling from a couple of the trees that were there.

Even the flesh color of these apples had diversity!
Some of the varieties we tasted were amazingly delicious! Others... let's just say they were reminiscent of old gym sock. We tried fruit from related species, that was so bitter and astringent it made your tongue numb. The textures of the fruit were incredible too, with some being mushy and grainy while others were crisp and light. The diversity in apples is amazing. I had no idea that so many varieties existed. There was even one apple variety that tasted almost "meaty" to me.

While I did bring back a lot of seeds, none of these will be the exact same as the apples from which I took them. Some plants are self-pollinated and their seeds will be just like the parent plants, others are only cross-pollinated. Apples are cross-pollinated and each seed is distinct and unique having some combination of genes from its parents. All apple varieties are maintained through cuttings called scions that are grafted onto rootstocks.

Breeding a new delicious apple variety takes a bit of luck and a lot of patience. While none of the apple seeds I planted might end up being the next Honeycrisp, they are a treasure trove of diversity and I'm excited to see what will grow.


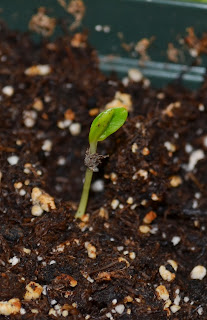
This apple seedling came from a Gala I bought at the grocery store. You don't have to go to New York to find apple diversity, it is right in your local supermarket. Remember, apples are cross-pollinated so each seed is unique.

Monday, September 16, 2013

Cucurbit downy mildew


Believe it or not another mildew exists that attacks your cucumbers, squashes and melons. It’s called cucurbit downy mildew. Powdery mildew and downy mildew are two different diseases caused by two very different pathogens. Whereas powdery mildew is caused by a fungus, downy mildew is caused by an oomycete, Pseudoperonospora cubensis. For some of the differences between oomycetes and fungi see the post on late blight.

Cucumber plants with downy mildew in a garden plot. You can see the yellowing foliage.
Similar to powdery mildew, downy mildew is caused by an obligate pathogen that requires a living host. It only affects the leaves of the plant; not the roots, stems or fruits. Don’t be fooled into thinking this won’t do much damage however. It turns out that downy mildew is a huge problem, especially on cucumbers. Commercial growers spend hundreds of dollars each year trying to manage this disease, and it can still cause crop losses. This pathogen is dispersed by the wind and can be blown up from the south or down from greenhouse grown plants in the north. The pathogen infects the leaves, begins to take nutrients away from it. Leaves will die, any fruit that are produced will typically be deformed, and the plant will eventually die.
Close up of a single leaf. The yellow patches on the leaf are downy mildew and will eventually turn necrotic as the disease progresses.
Symptoms
The symptoms differ depending on what type of cucurbit it’s on. On cucumbers you typically see very angular lesions, and they will be restricted by the veins. During early stages of infection the leaves show watersoaking which progresses to yellow angular patches. As the infection progresses those angular lesions become necrotic (dead) and if you look on the underside of the leaf will be hundreds of tiny grayish sporangia. They are too small to see well with the naked eye, but it will look like grayish dirt on the underside of the leaf. On melons, the lesions are more rounded, have a cholorotic (yellow) halo and can easily be confused with other leaf diseases (like Alternaria).
This is the underside of that same leaf. You can see the lesions being restricted by the small veins, and if you look closely you can see the grainy appearance of those sporangia inside the lesions.
Management
Unfortunately there aren’t a lot of cultural (or non chemical) controls for downy mildew. There are no varieties currently available with complete resistance to the pathogen, but some varieties are more susceptible than others. (Ask your local extension agent for varieties that are least susceptible in your area). Start cucumbers indoors to maximize their production time. You can slowdown the effect of the disease by scouting for symptoms. Often downy doesn’t show up until the end of July/early August when the weather is warm (not hot), and humid. Some years, if conditions are good, the disease has been seen in Michigan as soon as the first week of July. The Michigan State University Extension service puts out a notice as soon as downy mildew is detected in the surrounding states. They also have some information for home gardeners, I really like the pictures of the sporangia. The pathogen infects and spreads best in warm humid conditions. So, having good plant spacing and limiting your overhead watering can make the microclimate in your canopy less favorable for disease. If you catch the disease early enough you can remove infected tissue by double bagging it, and putting it in the city trash.
Downy mildew on a cantaloupe. The lesions aren't quite as angular and they have a yellow halo around each one.
So does this mean you should give up on cucumbers? Absolutely not! Start those seeds indoors, space your transplants adequately, scout often, and you'll still have a perfectly decent cucumber harvest.

Source contributing information:
http://ohioline.osu.edu/hyg-fact/3000/pdf/3127.pdf
http://msue.anr.msu.edu/news/downy_mildew_spores_detected_in_michigan
http://msue.anr.msu.edu/news/managing_cucurbit_downy_mildew_in_your_garden

Tuesday, September 3, 2013

Late blight

When people hear the term late blight, panic often ensues. Late blight brings to mind the Irish potato famine and rotting potatoes. For others, late bight is the kiss of death for their tomatoes. In the U.S. alone, dozens of scientists study late blight and how to manage it. But what is it? And why is it so terrible? Unfortunately, or fortunately, I have never had late blight in my own tomatoes so the only picture I have available is a fruit I found in a research plot.

Late blight is caused by the oomycete pathogen Phytophthora infestans. For those of you who haven't heard that term before oomycetes are almost something between a fungus and an alga. They are more closely related to algae, and are frequently called watermolds, but they have hyphae (those thread-like strands fungi produce) and they also produce tiny spores called sporangia. P. infestans is spread through the air. Its tiny spores are easily caught by wind currents and carried from field to field.

Symptoms
Late blight starts as small watersoaked lesions that rapidly grow,  and turn brown as the tissues die. When conditions are suitable, fluffy white growth can be seen on the dead tissue. Lesions spread, causing leaves and stems to shrivel and die. Lesions occur most frequently on the stems and leaves, but infections can also be seen on the fruit. On green fruit the lesions have a greasy look and are brown. Lesions on the mature fruit can sometimes have a ringed appearance.

A mature late blight lesion on a ripe tomato fruit. You can even see the growth rings.
Disease cycle
Early during the growing season the pathogen infects a susceptible host.  The predominant susceptible hosts for late blight are going to be potato and tomato. The disease cycle begins when a spore lands on a susceptible host and infects the tissues. At first, the pathogen doesn't seem to be dangerous. It steals some nutrients, but nothing much, and just as your plant is realizing that something isn't quite right..... the pathogen takes off. It starts destroying cells, dissolving cell walls, breaking down sugars, and eating the juices inside. Even susceptible plants try to fight back, but the pathogen has too large of a head start. As the disease progresses, large dark necrotic (dead) spots appear on the leaves and stems of the plant, these eventually have white fluffy growth on them. If you could look very closely (even a hand lens isn't enough) you could see little tiny white sporangia. These are the spores that will fly off and infect new plants. The pathogen can overwinter in crop debris, tubers or fruit.

You might be asking yourself, what chance do you have against something like this?

This is where research comes in. Dozens of researchers around the world study P. infestans. How it infects, how plant can resist it, what management practice work, which ones don't work; they even have tracking systems so you can see how late blight moves through an area.  Plant breeders are constantly working to develop varieties (tomato and potato) that are resistant to late blight. Unfortunately, the pathogen is always adapting to infect the plant.

Management
P. infestans can overwinter in the crop debris (potato tubers, tomato stems and fruits) so cleaning your plots is imperative for disease prevention the following year. The only management that traditional gardeners have that organic growers do not is chemical controls. For home gardeners, products like Ortho multi purpose fungicide, Acme Tomato and Green Light Maneb Plus contain effective active ingredients and are labeled for home grower use. If choosing to use a chemical control be sure to read the label and follow all safety rules and regulations for use. All other strategies are in the organic management section.

Organic management
Organic growers have few options for managing the disease once they have it. No organic chemistries or plant extracts have been shown to be consistently effective in controlling late blight. Copper, a staple for most organic management programs provides minimal control. Prevention is really the best way to manage the disease.

Starting with clean materials (tubers or transplants) is the first step. During planting, keeping plants properly spaced will help improve airflow and keep leaves dry. Watering plants from the base vs. overhead watering can reduce moisture on the leaves (Hartill et al. 1990). Similar to many pathogens, P. infestans requires a few hours of leaf wetness before it can germinate and infect the host. If you see the disease while scouting (cite scouting page), removing the infected plants  (double bag and put into the trash NOT the compost), will help reduce the levels of spores. At the end of the growing season be sure to remove all susceptible plant material, regardless of whether it had visible symptoms or not.

Crop rotation is effective for managing late blight, but you will need to rotate with a nonhost for at least 3 years. Late blight resistant varieties of tomatoes exist, and while they are not ideal for commercial gardens, they happen to be perfectly tasty for home gardeners. These include varieties like Mountain Magic, developed by an NC State tomato breeder, and Plum Regal.

Late blight can be difficult to manage, and is likely a disease you hope you never get. With proper scouting, culling and sanitation the losses of this disease can often be minimized.  If you do have late blight, contact your local extension agent immediately for the most up to date (and effective) control strategies for your area. If you don't have an extension agent click here for USAblight, a national site for late blight information.


For Fungicide Options: http://articles.mcall.com/2012-06-29/entertainment/mc-tomato-late-blight-treatment-prevent-20120629_1_late-blight-irish-potato-famines-spore-spread

Rubin E, Baider A., Cohen Y. 2001. Phytophthora infestans producs oospores in fruits and seeds of tomato. Phytopathology 91:1074-1080

Hartill WFT, Young K, Allan DJ, Henshall WR. 1990. Effects of temperature and leaf wetness on the potato late blight. New Zealand Journal of Crop and Horticultural Science 18:181-184

Dorn B, Musa T, Krebs H, Fried PM, Forrer HR. 2007. Control of late blight in organic potato production: evaluation of copper-free preparations under field, growth chamber and laboratory conditions. Eurpean Journal of Plant Pathology 119:217-240

NC STATE Extension bulletin on disease managemenet, chemistries and resistant tomato lines: http://www.cals.ncsu.edu/plantpath/extension/fact_sheets/Tomato_-_Field_Staked_-_Late_Blight.htm

Cornell University Extension bulletin on management and resistant varieties: http://vegetablemdonline.ppath.cornell.edu/NewsArticles/Tom_LB_OrganicMgt10.html - Plum Regal

Saturday, August 24, 2013

Corn smut anyone?


When your sweet corn has tasseled and those ears are starting to swell and grow, it's a constant battle to keep it free from bugs and animals. Raccoons and squirrels can decimate those ears just before you get to them, and somehow they manage to make it look like the corn is still there. If you manage to avoid them, then there is always the chance that under those husks lurks a corn earworm. However, there is another insidious organism waiting to hijack your corn. It's called corn smut, and it's been written about by scientists for over 100 years. This particular disease looks like some sort of alien growth bursting out of your corn (either the ears or the tassels).


Silvery gray galls of the corn smut on an ear of corn

What causes it?

It's caused by the fungal pathogen Ustilago maydis. This pathogen can infect the ears, tassels, stalks and the leaves of corn. They infect the host (in this case corn) tissue and they cause tumors to start to form. These are light gray/silver to a medium grayish-purple depending on the age of the tumor. The deeper color is the spores that are getting ready to be released.  

Hot dry weather followed by a nice wet period seems to be great for disease formation. However, some sources say that cool conditions and dry weather followed by a rain event can promote disease. Regardless, last year we saw a lot of smut, and, after my last garden harvest, this year seems to be another great year for the disease.

Close up of a smut gall, you can see the dark spores just under the silvery surface

How to manage it
Proper fertilization is important for minimizing disease severity, with higher amounts of disease being seen in over or under-fertilized corn (Aydogdu 2011). If you do get the disease the bet thing you can do is remove the infected tissues BEFORE the dark spores are being released. If the ears are infected you can eat them (see the next paragraph) or you can bag them up and throw them in the trash (not your compost). If some of the galls have black spores being released, go ahead and bag those up and throw them away. You'll need to rotate with a different crop for at least 2 years to manage the disease properly. The Virginia Tech Cooperative Extension office has a good list of sweet corn varieties with some level of resistance/tolerance in one of their bulletins as does an Oregon State University Extension bulletin:
Argent
Brilliance
Fantasia
Pristine
Seneca (Sensation, Snow Prince, Sugar Prince)
Silver (King, Prince)
Summer Flavor 72W

I have never grown any of these varieties, but what I can say is that the variety (I'll let you know what it is as soon as I find the package) I planted this year was quite susceptible. If you want to produce smut however, this might be a great variety to grow.

Fun tidbits
Believe it or not the disease (if you catch it early) is considered a delicacy and is served in many restaurants under the name huitlacoche or cuitlacoche. For those of you wanting to try it, you'll need to harvest it when the galls are still a silvery gray color. Huitlacoche can be used in soups, appetizers, tacos or served plain - here are some recommendations from the University of Illinois. Now before you go grimacing at the thought of eating it, think about it. This is a fungus, mushrooms are fungi. If you'd eat a mushroom, you should be willing to try huitlacoche.

 So if you can avoid getting this disease, that's great! But if you can't, go ahead and be adventurous and make the best of it.


Aydogdu M. and Boyraz N. 2011. Effects of nitrogen and organic fertilization on corn smut (Ustilago maydis DC Corda.). African Journal of Agricultural Research 6: 4539-4543

Skibbe DS., Doehlemann G., Fernandes J., and Walbot V. 2010. Maize tumors caused by Ustilago maydis require organ-specific genes in host and pathogen. Science. 328:89-92

Friday, August 2, 2013

Powdery mildew


Powdery mildew is probably the most common vegetable disease urban gardeners encounter. Those powdery little spots appear mid summer, and by the end of the summer they’ve covered entire leaves with their fuzzy white powder. While you might not be so sad to see those overly prolific zucchini decimated, the cucumbers and pumpkins won’t be far behind. So what causes this disease? Why do we get it every single year? And what can we do about it?

What causes it?
Powdery mildew is caused by a fungal, “obligate” pathogen. So what does that actually mean? An obligate pathogen means that it requires a living host, in this case a plant, to reproduce and survive.  Think of it like this: the pathogen wants to hijack the plant's resources for its own benefit, instead of producing those delicious vegetables. This lifestyle strategy is going to affect how we manage the disease and how it infects your plants. While powdery mildew is most common on cucurbits like cucumbers, squashes and melons other plants such as tomatoes, onions, peppers, chards and even sugar peas. However, many of these powdery mildew diseases are caused by different fungal species. Because powdery mildews are obligate pathogens this often means they have a very specialized relationship with their host plant. The powdery mildew on your squash is going to be different than the powdery mildew on your tomatoes, and it can NOT go from one to the other. I'll be providing information about powdery mildew management in general, but some specifics might not be appropriate for all species.


Where does it come from?
So I’ve just told you that powdery mildew is an obligate pathogen and it requires a living host. You’re first thought is probably, “If it requires living plant tissue, and isn’t living in the soil over the winter, how does it show up every year?”  Powdery mildew is an airborne pathogen. It’s spread as air currents flow across the U.S. Just because places like Michigan have winter, not all places do. Powdery mildew can survive in those places, and then as the weather warms it can slowly creep its way farther north. Even if we could somehow prevent it from moving up from the south, greenhouse grown plants could be another source of the pathogen. 

Early symptoms of powdery mildew. The small white spots can be rubbed off (but don't rub them otherwise you can spread the pathogen).

What does it look like?
The symptoms of powdery mildew are pretty much what you would expect. They start as small white powdery spots, sometimes they’re also a bit chlorotic (yellow), on the upper sides of the leaf and as time progresses those spots will expand and spread. Often lower leaves show symptoms first.

Conditions that favor the disease
Powdery mildews like high relative humidity, without a lot of a leaf wetness (Granke et al 2012). This is one of the reasons the first leaves to show symptoms are generally the lower leaves. The lower leaves are more protected from rainfall and are buffered by the surrounding leaves so they often have a higher relative humidity than upper leaves in the canopy. This is one reason why adequate plant spacing is so important for minimizing diseases. Low humidity promotes spore dispersal (like tiny airborne seeds), while the high humidity promotes infection (Clemson). Temperature can also be a factor - powdery mildew does not like it too hot, so those hot hot days are not going to be good for the pathogen.
Later symptoms of powdery mildew. This shot is of a leaf that was lower in the leaf canopy than the top picture. I moved the top leaves aside and hiding underneath was this plethora of powdery mildew spores.

Management
While prevention is the best way to manage a disease, at this point in the growing season minimizing the effect of disease is the next best thing. Whether you want to use chemical sprays or organic methods, early detection of the disease (through scouting) is critical for successful management. Studies have shown that sodium bicarbonate (baking soda) and whole milk can help minimize the growth and spread of powdery mildew. Baking soda, when used at a rate of 0.5% (weight per volume) combined with an oil, like SunSpray Ultra-Fine Spray Oil (also at a rate of 0.5%), reduced disease severity when sprayed on the plant's leaves (Ziv and Zitter 1992). Commercially available products like Kaligreen (82% potassium bicarbonate) can also help suppress the disease (Mcgrath and Shishkoff 1999). Whole milk, not skim, reduced disease severity at a higher rate than just baking soda in a more recent study by Ferrandino and Smith (2007).  The authors used a 50% milk to water spray, and did state that good coverage was needed, however that the cost may be prohibitive for large areas.

While these are options that should be readily available in most households, these are not as effective as chemical fungicides when the disease severity is high. So if you plan to use these products then you should definitely be careful to scout frequently and do your best to catch it early. If the infected leaves are few and far between you could easily remove a few leaves here and there. But likely you will have latent infections (when the plant is infected but you can’t see the disease symptoms), and you’ll have more diseased leaves soon.

Don't confuse variegation with powdery mildew. This squash has variegated (patterns of light and dark) leaves, but no powdery mildew.
Remember, powdery mildews need a living host. This means that the pathogen’s goal is to make your plants make food for them instead of you. Your goal is to keep ahead of the pathogen so that your plants can spend all their photosynthetic energy on making those delicious veggies you want to eat.


References contributing information in this post:

Clemson University Cooperative Extension bulletin
Ferrandino F.J., and Smith V.L. 2007. The effect of milk-based foliar sprays on yield components of field pumpkins with powdery mildew. Crop Protection 26:657 -663.

Granke L.L., Crawford L.E., and Hausbeck M.K. 2012. Factors affecting airborne concentrations of Podosphaera xanthii conidia and severity of gerbera powdery mildew. Hortscience 47:1068-1072

Mcgrath M.T, and Shishkoff N. 1999. Evaluation of biocompatible products for managing cucurbit powdery mildew. Crop Protection 18:471-478.

Ziv O., and Zitter T.A. 1992. Effects of bicarbonates and film-forming polymers on cucurbit foliar diseases. Plant Disease 76:513-517

Tuesday, July 23, 2013

Spider mites


With the hot weather we recently had, you might be starting to notice diseases or insects in your garden. One common garden pest during hot dry conditions is the spider mite. The two-spotted spider mite is actually an arachnid (not an insect), and is quite tiny being ¼ mm or less in length. These tiny little arachnids have piercing mouthparts that puncture the cells of your plants as they suck out the juices. This creates the “flecking” appearance on leaves. They have a broad host range, and are capable of colonizing many common garden plants including: eggplants, peppers, tomatoes, squashes, cucumbers, corn, many houseplants, etc. Adult spider mites overwinter in the soil, and lay their eggs on suitable host plants in the spring and summer. When weather conditions are suitable, the eggs hatch and begin to feed on the plant. When conditions are just right spider mite populations can bloom in no time. One day there are a couple of leaves with spider mites and within a week you can have an entire plant covered. Spider mites, as their name suggests, can spin disorganized webbing over the plant when infestations are high. This is one way to easily identify them.   

The splotchy patches of yellowing leaves are a good symptom of spider mites.
Symptoms and signs

Spider mite infestations are very easy to diagnose. If you see leaves that are becoming flecked with patchy yellowing, or exhibit bronzing then your plant is a good spider mite candidate host. Spider mites live on the underside of the leaf, so to look for them you’ll need to flip the leaf over. It is possible to see them with the naked eye, but a hand lens with at least 10x magnification is best for a good view. If you don’t have a hand lens, and even if you do, you can take a piece of white paper and shake a leaf over it. If you have spider mites, they should fall onto the paper and you should be able to see them begin to slowly crawl.

Close up of infested leaf

Management options

Not all mites are bad though. One of the top beneficial insects for controlling spider mites is other mites! If you smear the mite on a piece of white paper and it is green, it’s likely the parasite. If it’s orange or yellow it is likely a beneficial.  You can buy beneficial insects from companies like Koppert that specialize in biological controls, encourage beneficials through native plants or successive flowering plants. Or you can raise your own mites using subset of the predatory mites and growing them in bran. This can take a bit of time, but it very convenient for controlling mites over multiple months in a large area. Other beneficial insects like lady bugs, minute pirate bugs, and lacewings can also be used to control spider mite infestations with varying degrees of effectiveness.

Turn an infested leaf over and you can see the grainy appearance of the spider mites, their dust, eggs and frass. If you look really closely you can see yellow spider mites with little red dots on their bums.
If the infestation is light you can try to control mites using insecticidal soaps, horticultural oils, miticide sprays, or common soaps (Ivory and Murphy’s oil soap work well). If you’re using soaps or oils, don’t apply while the weather is hot and sunny because these can damage your plants if you’re not careful. With soaps in particular, you can typically apply with a hand sprayer and rinse an hour after application. The soapy water creates a film around the spider mite, suffocating it according to entomologist Dan Hulbert. Adequate watering is important to help your plants deal with the added stress of the spider mites. Some sources cite spraying water on the plants to help control mild infestations of spider mites.

Sources contributing information to this post:
Virginia Tech Extension bulletin

Tuesday, July 16, 2013

Insects and Diseases in the Garden: Scouting 101


As the summer progresses pests are likely to become a part of your garden. You might have already seen those faint spots that foretell the powdery mildew that will soon be visible on most of your zucchini plants. I know I have. Managing garden insects and diseases is essential for a long bountiful harvest. Even the most prolific variety of tomato or zucchini can have low yields if their resources are spent fighting leaf spots and rots. Commercial growers have a wide range of chemical and cultural controls that they can employ to manage diseases. Home gardeners, on the other hand, have limited chemical options; and most prefer to abstain from chemical controls entirely. This limits us to cultural options, insecticidal soaps, and some sprays, combined into an integrated pest management or IPM approach. IPM uses a combination of multiple techniques to manage pests below a certain threshold. This means that you’ll still probably get disease and insects, but the emphasis will be on keeping it at low levels.
While the slug is no where to be seen, the damage is clear. Low levels can be tolerated, but too much damage and yield becomes reduced.
 While much can be done with plant spacing, attracting beneficials, and rotating crops, at this point in the season we can't change those things. So, we are in defense mode. The first step in defense-mode management is going to be scouting. If you can catch the disease or insect early on, you have a better chance of minimizing its effects. Scouting involves walking through your garden plot and looking for symptoms or signs of disease and insects. Symptoms could be wilting or yellowing leaves, a dark leaf spot, or maybe a discolored fruit. Just to be clear, not every spot you see is going to be a disease, not every insect is damaging, and not every time a leaf wilts is it going to mean you have a root rot. But if there has been plenty of rain and a plant is still wilting, that is a good indicator that you might have a disease. 
These chlorotic (yellowing) leaves could be a symptom of insects, disease or nutrient deficiency.
 Scouting should be done every week. Typically garden plots are small enough that you should be able to find the time to walk through them weekly. It could even be while you are pulling weeds or harvesting. When you scout try to look at both the tops and undersides of the leaves (many insects hide underneath the canopy), and if you see something suspicious make note of it. Diseases can progress very quickly when weather conditions are suitable, and some insects like aphids can have explosive growth in their populations. I went to one commercial grower’s field that was covered in rotting fruit, and he swore that he had been out scouting last week and everything looked healthy. Later that same week though, the weather conditions became perfect for the disease (and the pathogen was present in his field) and the entire field was lost. 
Just a week ago a single leaf from this plant was wilted. Now the whole vine is collapsing.
If properly and consistently done, scouting can help us to identify and start managing small problems before they become huge problems.

Wednesday, July 10, 2013

Disease guides are ready!

As you may, or may not, know I've been working on a small guide to help home gardeners identify common vegetable diseases. Well the wait is over, the printers have cooled, and they're finally ready. If you're in the Lansing area there is a disease workshop with the Lansing Garden Project at Foster Park on Thursday July 11, 2013 at the Garden Project Resource Center 2401 Marcus St. Lansing, MI 48912 from 6pm to 7:30pm. We'll be distributing these tiny pocket guides and diagnostic hand lenses to workshop participants. More workshops are being scheduled for the Detroit and Flint areas, so if you miss this one there are others. If you're not in the MI area, but would like one, email me and I can send you a PDF.


Sunday, June 30, 2013

Fertilizing the Garden


Whether you grow organically, conventionally or whatever-you-have-available-ly, making sure your plants have enough nutrients is an important part of good gardening. If your soil already has a normal pH, a healthy amount of organic material and available nutrients you may be fine, but if it doesn’t you may need to add additional fertilizer and nutrients to your plants. (If unsure you can check the mineral composition by having your soil tested through a soil testing facility near you). Whether you choose to improve soil nutrients by compost, green manure, or synthetic fertilizers, the choice is up to you.

Knowing what is in your fertilizer, and what your plants need is the first step in proper fertilization. Plants require both macro and micronutrients, and the composition and amount of these nutrients change depending on what growth stage your plants are at. The three macro elements plants require are Nitrogen (N), Phosphorous (P) and Potassium (K). Micronutrients and the amount needed, vary for particular plants, but boron, manganese, sulfur and calcium are all common ones. While these may not be as well known as the macronutrients, they too play an important role in your plant’s health. Even if macronutrients are abundant, plants can only be as successful as the least available nutrient.

Peas happily growing in the garden. These likely don't need fertilizer.
Commercial fertilizers typically have three numbers (i.e. 20-10-5). The first number refers to the nitrogen content, the second to your phosphorous and the third to the amount of potassium. You can buy complete fertilizers (with some combination of all three nutrients) or you can buy single element fertilizers (pure phosphorous fertilizer would be 0-10-0). Nitrogen is a major component of your garden plants and is essential for plant growth. In many fertilizers it is going to be the bulk of the nutrients. Using a granular application of nitrogen before planting can supply sufficient nitrogen for the entire growing season. Nitrogen will boost your foliage growth, increasing plant size and photosynthesis. Nitrogen sounds amazing for your plants, right? Well too much of a good thing can also be a problem. Too much nitrogen can leach through the soil and contaminate ground water and it can reduce flowering, which will decrease your yields in many instances.

Phosphorous (the second number) is important for energy production, protein synthesis and plant growth. Potassium (the third number) is important for many plant processes including response to drought, insects. Early during the growing season when the soil is cooler, it is more difficult for plants to take up phosphorous (and potassium). As the weather warms, these minerals will become more available and fertilization may not be necessary (depending on your natural soil levels).
For best yields, cucumbers need additional nutrients
In general, you should apply fertilizer early in the growing season to promote vigorous plant growth, applying a fresh mixture almost monthly Remember, fertilizing won’t improve your soil’s structure, microbial community, or drainage, but if properly implemented can improve your plants’ health and yields. So even though rain may be abundant, don’t forget to add a to add some extra nutrients to your plants. They’ll love you for it.

Sources consulted:
Utah State University Bulletin on successful fertilizing:

From the Missouri Master Gardener’s manual: http://extension.missouri.edu/p/MG4

Oregon State University manual:

Penn State Guide on Fertilizers:

Wang M., Zheng O., Shen O., Guo S. The critical role of potassium in plant stress response. 2013. Int. J. Mol. Sci. 14(4) 7370-7390.

Saturday, June 15, 2013

National Pollinator week: Bee-palooza

What do birds, wasps, bees, flies and some mammals have in common? They can all be pollinators!
Syrphid fly on a flower (syrphids mimic bees at a first glance, but look more closely and you'll see it's actually a fly).
Pollinators are an essential part of any gardening environment and six years ago the U.S. Senate designated a week in June to be National Pollinator week. This year, that week is June 17-23, 2013. To celebrate the occasion, Michigan State University is hosting its 2nd annual Bee-palooza on campus Sunday (June 23rd) from 1-4pm at the Horticultural Demonstration gardens. If you're in the area definitely stop by and check out this free event featuring pollinators. If you aren't in the area, go online and see what is happening in your own neighborhood.

A version of a solitary bee hotel (at MSU).
There will be MSU entomologists (scientists who study insects) talking about native plants, attracting pollinators (native bees and other insects), building nesting boxes for solitary bees, bee-friendly garden designs and there will be plenty of activities for children as well. If you want more information here is their Facebook page for the event. (Note: In the event of rain it will be canceled.) They will also have a live bumblebee hive on display and stinger-less males for people to touch.

Bumblebee on a flower.
Whether you want to build your own bee hotel, add bee friendly plants or just enjoy the MSU gardens, this event is sure to be fun and educational.

I hope to see you there!

If you want to know more about national pollinator week and ways to celebrate here are a couple of sites:
http://pollinator.org/pollinator_week_2013.htm

http://www.wildlifehc.org/ideas-for-celebrating-national-pollinator-week/

Wednesday, June 5, 2013

Weeds in the garden

 
Sorry for the delay in this post, but when the sun is shining and the garden is calling it’s hard to sit in front of a computer. Over the next couple of weeks we’ll be covering basic garden care and we’ll start talking about insects. We’ll also be starting to feature great gardens around the Greater Lansing areas. If you (or someone you know) has a garden you’d like featured send me a message.


Gardening season is off and running, but for many of us gardening is our hobby or side activity. Life, work and other things can quickly fill the time that you’d like to put into your garden. While there are some times of the year that your garden can handle neglect, early in the spring is not one of them.

Weeds
Those tiny seemingly innocuous weeds you see popping up might not seem like they are hurting your transplants and seedlings, but looks can be deceiving. Besides being an eyesore, weeds can cause lasting damage or setbacks to your transplants and seedlings especially if allowed to stay for a couple of weeks. A lot of research has been done on weed management, but in general weeds should be removed as soon as possible and definitely before they have reached the four to six leaf stage. This means that weeds should be pulled before they have four real leaves.  For some vegetables (like leeks) weed control should be started as soon as seven days after transplanting! A study on cabbage, cucumbers and tomatoes found that plots needed to be kept weed free for 3-4 weeks after transplanting or yields were reduced. In snap beans yields were reduced by almost 50% when weeds (emerged at the same time as the beans) were not controlled. Weeds don’t only reduce yields by stealing nutrients and shading out those transplants. Sometimes, they can also be hiding disease-causing organisms.
This lambsquarter has four true leaves and should be pulled.
 
Weeds can also harbor pathogens. Sometimes a plant can be infected with a pathogen, but it won’t show any symptoms. There won’t be any leaf spots, yellowing, rot etc. Depending on what it is, that pathogen can then infect and cause disease (with symptoms) on your vegetables. Did you know that nightshade, horse nettle and jimson weed are in the same family as your tomatoes, eggplants and peppers? And lambsquarter and pigweed are in the same family as beets and swiss chard. Just like you need to rotate crops to reduce disease pressure, you also need to manage weeds, especially those in the same family. A number of diseases are believed to survive on weeds including powdery mildew, downy mildew, and some leafspots and viruses.

These weeds are small now, but can quickly overtake a young bean plant

So make sure to find the time this spring to get out there and remove those weeds before they get to be a real problem! And I’ll be doing the same. 

Some sources on weeds:
http://extension.missouri.edu/p/IPM1023-45

Turson, N. et. al. 2007.  Critical period for weed control in leek (Allium porrum L.) http://hortsci.ashspublications.org/content/42/1/106.full.pdf

Weaver, S. 1984. Critical period of weed competition in three vegetable crops in relation to management practices.  DOI: 10.1111/j.1365-3180.1984.tb00593.x

Groves, R. et al. 1995. Association of Frankliniella-fusca and 3 winter weeds with tomato spotted wilt virus in Louisiana.

Aguyoh, J. and Masiunas J. 2003. Interference of redroot pigweed (Amaranthus retroflexus) with snap beans.

Monday, May 20, 2013

Transplanting Basics


 At this point you probably have weeks of time invested into your seedlings. You’ve made sure they had enough light, water, and nutrients to thrive, you’ve hardened them off, prepped your seedling beds, and now you’re ready to plant them. Don’t ruin all those weeks of work by using poor transplanting habits. Some plants are more frost/cold tolerant than others, and you’ll want to take that into consideration when putting those seedlings outdoors. Some seedlings, like those of peppers, cucumbers and squashes, eggplants and tomatoes can easily be damaged by frosts. While others like broccoli, cabbage, cauliflower and brussel sprout seedlings can handle some degree of frost and are less likely to be damaged. And don’t forget to get your peas, chards and kale direct seeded if you haven’t already done it! They can also handle some degree of frost and will be perfectly happy in the cooler days (if we have any left this spring).

Newly transplanted squash
When transplanting make sure that the seedlings are well watered before planting. Transplanting is incredibly stressful, and you want to make this transition as easy as possible for them. Stressed plants/seedlings are more susceptible to diseases and environmental conditions (cold, heat, water loss) so try to keep them happy.

Support the stem and try not to pull on it - pulling can damage it
Before you transplant anything you should have a master plan. Having a predefined plan of where each plant is going will help maximize your space, and later in the season can help reduce your diseases.  After you’ve figured out where everything is going then we can start planting. Determine the spacing you want your plants to be. Your seed packets have recommended spacings that should guide you in this. First make a hole in the soil where you are going to put your plant. Then gently loosen the plant from the pot by pushing the root ball from the bottom of the pot. 
Never pull a plant out of the pot by the stem or leaves. Place the seedling into the hole in the ground you’ve already made and place it so the potting mix is slightly (~1/4”) below the soil line. Then use the surrounding soil it to make it level. Potting mix is lighter and has less organic matter than most soil. This means that it dries out much quicker. By covering the top of the potting mix with a layer of soil you protect it from drying out too quickly. After you’ve completed your transplanting it’s time to water everything. Give the seedlings a good solid soaking, this will promote root growth deep into the soil, and ease the shock of transplanting. 

D. Hulbert (MSU Entomologist) helps move soil to level the planting

Especially early during the season frosts can still be a danger. Don't let all the hard work go to waste by letting the freeze. In the Lansing area our final frost date is June 15th! Remember sheets, tarps and blankets can protect those perky plants from deadly frosts. Just be sure to check the weather each evening. 

(Kansas State University) http://www.hfrr.ksu.edu/doc1793.ashx 


Thursday, May 16, 2013

Friends help friends germinate

So this week's post is on proper transplanting. Since it isn't quite ready to be posted though, I decided to share a fun piece of gardening science that just came out this week. This is from a scientific paper published by Monica Gagliano and Michael Renton in the open access (which means anyone can access it) journal BMC. In case you don't want to read the full story, here is the synopsis: some plant species promote the germination of other plant species. That's right, planting certain species together might actually improve your germination. 

Garden lore and tradition is full of tips and tricks, but isn't it nice to know there is more than tradition and lore to some of these things? In this study, the authors looked at the germination of chile peppers when planted with chile peppers and basil. Surprisingly, pepper seeds germinated better when a basil plant was planted near them. Chile peppers also germinated slightly better when adult pepper plants were nearby.


This work was all done in a controlled environment (e.g. not a garden plot), but as the authors say, this validates claims by gardeners that basil helps chile peppers grow better. It might be a little late for this year, but this gardener is definitely going to give it a shot with her basil and chiles.